

Mastering the Magic Circle and Beyond: A Crochet Beginner's Guide - Crochet Basics
Crocheting is an art as old as time, a kinesthetic symphony of thread and hook that has threaded its way through generations. For those picking up the art of crochet, the beginning can feel both exhilarating and daunting. Like any craft, taking those first steps is essential. But what exactly are those foundational moves that every crocheter needs to know? This blog post is designed to guide you through the 3 most crucial techniques for someone learning how to crochet.
Whether you're looking to unwind with a new hobby or to handcraft meaningful gifts, you've arrived at the right place. We’re going to take a deep, yarn-filled dive into the world of crochet, starting with the ever-important magic circle, a foundational stitch, and some easy-peasy projects perfect for new crocheters. By the end of this post, you’ll be in stitches — the good kind!
Unraveling the Magic Circle
The magic circle, sometimes known as the crochet magic ring, is a method of beginning a project that allows you to tightly close the center, giving a seamless look. This technique is commonly used when starting a project that is worked in the round, such as amigurumi(crocheted stuffed animals or dolls).
The magic circle is an essential skill to master, and we're here to demystify the process for you. Here’s a detailed, step-by-step approach to nailing the magic circle.
Step 1: Making the Loop
Start with the tail of the yarn over your fingers, much like you would if you were casting on in knitting. Keep about a 6-inch tail to weave in later.
Wrap the working end of the yarn (the end attached to the yarn ball) behind your fingers and bring it back up over the top.
Cross the yarn over, creating a loop around your fingers. This is your first loop in the magic circle.
Step 2: Hook It Up
Slide your crochet hook under the first loop and grab the second loop (the working yarn) from the back, pulling it through the loop on your hook.
This creates a secured loop around your hook, which is the beginning of your magic circle.
Step 3: The First Chain
Chain one to secure the loop in place. This chain does not count as a stitch, but it’s essential for keeping your circle stable.
Continue by working the number of stitches required in your pattern into the ring. For a standard starting amigurumi circle, you’ll often work six single crochet stitches.
Step 4: Closing the Circle
Once you’ve worked your stitches into the circle, pull the tail of yarn to close the center. You can then join with a slip stitch, and voila! — you have a beautifully closed circle to start your project.
Remember, practice makes progress. The magic circle can be fiddly at first, but keep at it, and soon you’ll be creating perfect circles with ease.
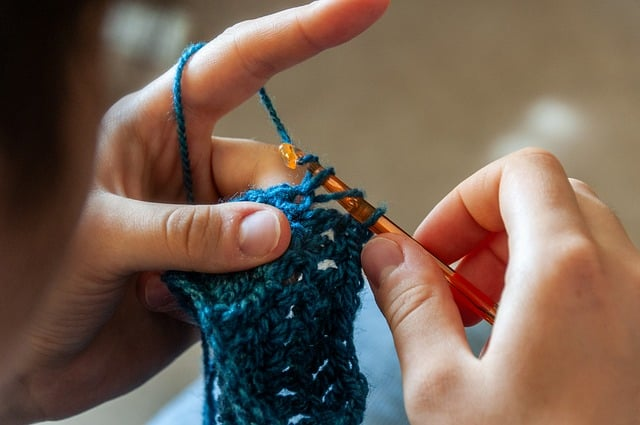
The Fundamentals of Single Crochet
Single crochet (sc) is the most basic stitch in crocheting. It’s tight, it’s even, and it’s an excellent foundation for building your own crochet pattern repertoire. The single crochet stitch is used in just about every crochet project, from blankets to bags to sweaters.
To begin, you'll need to understand how to create a slip knot and how to hold your yarn tail and crochet hook. Once you’re ready, we can move onto the single crochet.
Step 1: Starting a Row
Create a foundation chain by making a series of chain stitches. This will be the length of your first row. The foundation chain acts as the starting point for the rest of the stitches in your row.
Once you have your foundation chain, begin by inserting your hook into the second chain from your hook (not counting the loop on your hook). You should have two loops on your hook.
Step 2: Pull and Loop
Wrap the yarn around your hook from back to front, then pull the yarn through the chain. You now have two loops on your hook.
Step 3: Close the Deal
Wrap the yarn around your hook again and pull it through both loops on your hook. This completes the single crochet.
Continue the single crochet across the row by repeating steps 2-4. When you reach the end of the row, chain one and turn your work.
Step 4: Completing the Row
For the second row and all subsequent rows, work your single crochets into the tops of the stitches in the previous row. This means you insert your hook under both loops of the “V” shape that makes up the top of the stitch from the row below.By mastering this stitch, you’re well on your way to creating a wide range of crocheted items. The single crochet is the backbone of so many projects and can be used in endless ways to create different textures and patterns.
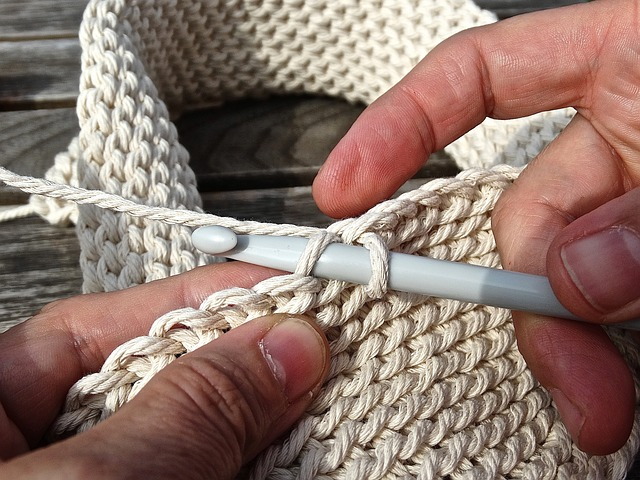
The Versatility of the Double Crochet
The double crochet (dc) stitch is another building block to add to your crochet library. It's taller than the single crochet, which makes it great for stitching quickly across long rows. The double crochet is a versatile stitch and is used for all sorts of decorative effects.
Here's how to work a double crochet stitch:
Step 1: Yarn Over
Begin by wrapping the yarn over your hook from back to front. This is called a yarn over (YO).Step 2: Insert Hook
Next, insert your hook into the stitch. You can start in the third chain from your hook to create a straight edge or the second chain to create a bit of a slant.Step 3: Yarn Over and Pull Through
Yarn over (YO) again and pull the yarn through the stitch. You should now have three loops on your hook.Step 4: Yarn Over and Pull Through Two Loops
Yarn over (YO) once more and pull through the first two loops on your hook. You should now have two loops on your hook.Step 5: Yarn Over and Pull Through Remaining Loops
Yarn over (YO) one last time and pull it through the remaining two loops on your hook. This completes the double crochet.The double crochet can be used to crochet patterns, create lacy patterns, solid fabrics, and everything in between. It's a much-loved stitch in the crochet world for its speed and versatility.
Crafting Your First Projects
Once you’ve got the hang of the magic circle and the basic crochet stitches, it's time to put your new skills to the test with some beginner-friendly crochet projects too. Here are a few ideas:
Easy Coasters
Crochet coasters are quick to make and double as both a practical household item and a charming decoration. Start with a magic circle, work a chain stitch or set number of single crochet stitches into it, and keep going in a spiral until your circle is the size you desire. You can finish with a slip stitch, weave in the ends, and you’re done!
Simple Scarf
A single crochet scarf is a classic first project. It teaches you to work even rows and provides a tangible reward for your effort. Simply chain a number of stitches that is about as long as you want your scarf, then put one single crochet stitch in each chain across. Chain one, turn, and continue single crocheting across the rows. Repeat until your scarf is the desired length, and you’re ready for the winter chill!
Basic Beanie
A beanie is a satisfying project that introduces you to working in the round. Start with a magic circle, work increases in every stitch around, then work even for a few rows. When you have the diameter you want, start decreasing by working two stitches together. Close the top with double crochet stitches, and you’ve got a cozy hat to keep you warm in no time.
Conclusion
Crochet is an art form that rewards patience and practice. With the first stitch of the magic circle under your belt, the single crochet in your toolkit, and the double crochet at your fingertips, you're well on your way to many hours of joyful crafting. Remember, each new stitch and pattern you learn adds to the canvas of what you can create with this versatile craft.
Take it one loop at a time, and before you know it, you’ll be creating garments, accessories, and decor items that are not only useful but are imbued with the care and love you’ve poured into learning this beautiful craft. Whether you're looking for a hobby to de-stress or a way to add a personal touch to life’s little necessities, crochet is a perfect fit. Happy hooking!
FAQ
How do you actually perform these crochet techniques?
- Magic Circle: This technique involves creating a loop with your yarn and then inserting your crochet hook to start your stitches. The trick is to hold the loop securely and work your stitches around the yarn, pulling the tail end to close the circle tightly. It's essential to maintain tension to prevent the circle from loosening.
- Single Crochet (sc): To make a single crochet, you insert the hook into the stitch, yarn over (wrap the yarn around the hook), and pull back through the stitch (two loops on the hook). Then, yarn over again and pull through both loops on the hook. This creates a single crochet stitch.
- Double Crochet (dc): Start by yarning over the hook, then insert the hook into the stitch. Yarn over again and pull through the stitch (three loops on the hook). Yarn over and pull through the first two loops (two loops left on the hook), yarn over again and pull through the remaining two loops. This completes a double crochet stitch.
What are the common mistakes to avoid while learning these techniques?
- In the Magic Circle, a common mistake is not securing the initial loop properly, which can cause the work to unravel. Also, pulling the tail too tight or too loose can distort the circle.
- For Single Crochet, one of the most frequent errors is inserting the hook into the wrong part of the stitch or missing a stitch, which can lead to uneven work or changes in the project's size.
- When doing the Double Crochet, a typical mistake is losing count of yarn overs or pulling through the wrong number of loops, which can alter the height and consistency of the stitches.
Can these techniques be modified for advanced projects?
- The Magic Circle can be adapted for various patterns in amigurumi, where a tight, adjustable starting circle is crucial. It can also be used in creating intricate motifs in lace patterns.
- Single Crochet is incredibly versatile. For advanced projects, it can be used in combination with other stitches to create textures, or it can be worked in the back loop only or front loop only to create ribbing or directional texture.
- Double Crochet can be modified for advanced projects by adding additional yarn overs to create taller stitches, like treble or double treble crochet. It's also the basis for creating various patterns like shells, clusters, and lace designs. By varying the placement of the double crochet (like working around the post of the stitch or in different parts of the previous row), different textures and patterns can be achieved.


